Showing posts with label DearGeekChic. Show all posts

Tuesday, 9 July 2013

Leavers' Ball/Prom Hair and Makeup

I've just uploaded a video of 'Get Ready With Us: Leavers' Ball/Prom', however, there wasn't time to show all the products used.  So, here they are!  If you haven't seen the video, then check it out here:


Noori


Hair 


Waterfall braid and flower clip
Nicky Clarke Curling Iron
Paul Mitchell Gloss Drops
Tresemme 24 Hour Body Finishing Spray

Makeup


Skin

Maybelline Fit Me 220 - Natural Beige
Natural Collection Loose Powder
Rimmel Blush in Santa Rose
Rimmel Bronzer in Sun Bronze
MAC Studio Fix Concealer in NW20
MAC Mineralize Skin Finish in Soft and Gentle

Eyes

Rimmel Scandaleyes Mascara
Urban Decay Primer Potion
Maybelline Colour Tattoo in Pink Gold
Urban Decay Eyeshadows in Flow, Free Bird, Virgin, Roasted, Blackout and Dark Horse
Maybelline Gel Liner in Black

Lips

Topshop Lips in Crystal


Jess


Hair

Twisted pinned back curls
Nicky Clarke Curling Iron
Paul Mitchell Gloss Drops
Tresemme 24 Hour Body Finishing Spray

Makeup


Skin

Marks and Spencers Limited Collection Moisture Tint in Light
Collection 2000 Lasting Perfection Concealer in Fair
Natural Collection Loose Powder
Rimmel Bronzer in Sun Bronze
MAC Mineralize Skin Finish in Soft and Gentle
Colourworks Blusher

Eyes

Urban Decay Primer Potion
Urban Decay Eye Shadow in Half Baked, Smog, Dark Horse, Virgin and Creep.
No.7 Stay Perfect Metallic Eyes Pencil
No.7 Exceptional Definition Mascara

Lips

Barry M Glossy Tube in Bright Pink

Nails

Barry M Gold Foil Effects with Pink Silver Glitter Accent Nail.

Jenny


Hair

Twisted ponytail
 This is the picture I followed but I left my hair looser at the bottom as opposed to being a tighter ponytail.

Nicky Clarke Curling Iron
Paul Mitchell Gloss Drops
Tresemme 24 Hour Body Finishing Spray

Makeup


Skin

Revlon Colourstay Oily/Combination in 110 - Ivory
Collection 2000 Lasting Perfection Concealer in Fair
Rimmel Stay Matte Powder in Translucent
Rimmel Bronzer in Sun Bronze
Rimmel Blush in Santa Rose
MAC Mineralize Skin Finish in Soft and Gentle

Eyes

Urban Decay Primer Potion
Urban Decay Eyeshadow in Armor, Desperation, Sin, Anonymous, Blackout, Dark Horse and Half Baked.
The Body Shop Loose Eyeshadow in Euphoria
Estee Lauder Signature Eyeshadow Quad in 01 Sand
Maybelline Gel Liner in Black
Maybelline The Falsies Waterproof Mascara
Ardell Demi Wispies False Lashes

Lips

Soap and Glory Sexy Motherpucker Gloss in Plum Jam

Nails

China Glaze in Frostbite

Thursday, 13 June 2013

The Great Gatsby Film Review and Makeup Tutorial


I've been looking forward to seeing 'The Great Gatsby' for months as the release date kept getting pushed back.  Having studied the novel in English Literature, I was skeptical as to how the first person narration would work on the screen as well as getting across Fitzgerald's symbolic references.  I think Baz Luhrmann succeeded in doing this but like the rest of the film, this was done with a heavy hand.  From start to finish, the film is over-the-top and exuberant in its approach.  That is not to say it is a bad thing,  as the glittering party scenes are brought to life in a vivid, vibrant style of the 1920s.  However, the more somber exchanges regarding the Gatbsy - Daisy - Tom love triangle seem to fall a bit flat in comparison. It is as though Luhrmann's dazzling style is as stiffing as Mrytle's apartment, preventing the actors from just being able to act.


I think Luhrmann felt trapped between the novel and cinematic world, desperately trying to mash the two together.  In trying to stay true to Firzgerald's tale, he almost cheapens it by getting Nick Carraway (Tobey Maguire) to tell his story to a psychiatrist.  This is further emphasised, by extracts of the text actually flashing up on the screen, perhaps a plea from Luhrmann to understand he is trying to respect the novel.  Whilst the symbols of the green light and eyes of T.J. Eckleberg are included, they are repeatedly thrown at the audience so there is no chance of missing them.  The film lacks the subtleties that the novel is so renowned for, restricting the audience's interpretation of it.


So far, it seems as though I thought the film was terrible when I actually found it very enjoyable.  You cannot doubt that the film is visually beautiful, almost surreal.  The sweeping camera angles enable a real sense of the geography and how East Egg and West Egg relate to each other.  In addition, there is some fantastic acting in this when the characters can breathe among the elaborate bouquets of flowers, fireworks and wealth.  Carey Mulligan does a phenomenal job as Daisy, showing the difference between her carefree attitude upon her first acquaintance with Gatbsy and the bittersweet, tragic longing when she is reunited with him.  Leonardo DiCaprio also takes on the challenging role of Gatsby with ease, portraying both his mysterious allure and desperation to relive the past.


There has been much controversy over the soundtrack that accompanies this movie, ranging from Jay-Z to jazz versions of Beyonce's 'Crazy in Love'.  I love the soundtrack, however, and think it effortlessly takes the audience on a journey through the film, blending both modern and old musical themes.  My personal favourites from the soundtrack have to be 'Over the Love' by Florence and the Machine and 'Young and Beautiful' by Lana Del Ray as I think they perfectly capture the essence of lost love.


Overall, I really enjoyed the film and think it is an honorable attempt on the twentieth century classic novel.  I think it is pretty evident that it is a Hollywood movie aimed at the mass market, not relying on previous knowledge of the novel.  Some may view this as negative but I don't as it has encouraged my younger sister to read the novel which can only be a good thing.


Daisy Buchanan's Makeup


Daisy wears really pretty, elegant makeup throughout the film.  First, you need to start with a flawless base so you may want to use a fuller coverage foundation and mattify it with some powder. Next, apply a little highlighter along the tops of the cheekbones and under the browbone.  Finish off the face makeup with a pale pink blusher on the apples of the cheeks, blending it out well.

Onto the eyes, and you want to lightly define the brows and slightly elongate them as Daisy has quite long brows.  Next, prime the lids and sweep a matte, grey eye shadow across, blending well.  After, apply a little of a matte, cream coloured eye shadow in the inner corner of the eye and blend again.


Line the upper lash line with a gel or liquid liner, finishing with a small flick.  Apply lots of mascara to curled lashes or apply a false set.  Finally, line the lips with a nude-pink lip liner, emphasising the cupids bow.  Then, apply a small amount of a matte, pale pink lipstick.


For more details on how to achieve this look, check out my tutorial: http://www.youtube.com/watch?v=7IBn1yv3ps4&feature=youtu.be


Products I used:

L'oreal Infallible Foundation in Porcelain
Collection 2000 Lasting Perfection Concealer in Light
Rimmel Stay Matte Pressed Powder in Translucent
MAC Mineralize Skin Finish in Soft and Gentle
Unbranded blusher
Urban Decay Primer Potion
Urban Decay Eyeshadow in Desperation, Anonymous (on lid) Buck and Naked (on brows)
Maybelline The Falsies Mascara
No7 Lasting Perfection Lip Pencil in Nude
Kate Moss Lipstick in 08


Sunday, 10 February 2013

Nivea Express Hydration Primer Review

I've been hearing about this product from several bloggers recently so I decided to pick it up and try it for myself.  Nivea isn't a brand I buy many products from but I've been looking for a good primer and moisturizer and this combines both!


I like that it is available for two different skin types: Normal/Combination and Dry/Sensitive.  I have it in Normal/Combination and I'm really pleased with it.  An extra few minutes in bed each morning is always my priority, so having two products combined in one easy step is a big bonus in my books!

The product feels lovely on the skin and absorbs quickly - I normally wait a minute or so before doing my foundation.  It definitely makes my foundation glide on and blend much more easily than normal.  I usually wear a long lasting foundation so I didn't notice much difference in term of wear time but areas that tend to get a bit dry towards the end of the day didn't when I applied this.

I'm really pleased with this product and for just £4.99 from Superdrug you can't really go wrong.

Tuesday, 8 January 2013

Happy New Year!

Hi everyone, Happy New Year!  I'm sorry my blog has been a bit empty recently but I've been focusing on my January Youtube project: New Year, New You!  If you haven't seen it yet, then here's the video that explains it all:


I got quite a few products for Christmas that I'm going to be reviewing soon, so keep an eye out for some new blog posts.  I have exams towards the end of this month which I'm busy revising for but February will hopefully bring more blogging time!

I hope you're all having a great 2013 so far!

Love Jenny :) xxx

Friday, 7 December 2012

Bella Cullen Transformation

If you haven't already seen my 'Bella Cullen Transformation Tutorial', then check it out below.  This post is just going to go over what products and clothes I used.


Skin:
L'oreal Infallible Foundation in 'Porcelain'
17 Shine Control Pressed Powder
MUA Undressed Palette in 'Shade 3' or 'Naked' from Urban Decay's Naked Palette
17 Limited Edition Bronzing Powder


Eyes:
Mac Paint Pot in 'Painterly'
MUA Undressed Palette in 'Shade 3' and 'Shade 5' or 'Naked' and 'Buck' from Urban Decay's Naked Palette
Estee Lauder Signature Eyeshadow Quad in '01 Sand'
Maybelline Eyestudio Geyliner in Charcoal
Barry M Shimmering Lip and Eye Crayon
Maybelline 'The Falsies' Mascara
17 Electronica Lashes


Lips:
Neutrogena Norwegian Lip Balm
No.7 Perfect Lips Pencil in 'Nude'
Barry M Shimmering Lip and Eye Crayon

Hair:
Vo5 Ultimate Hold Hairspray

Outfit:
Grey Cableknit Sweater from Old Navy (bought a few years ago but they are many similar ones available)
Dark wash jeggings or skinny jeans from Aeropostale
Black converses


If you try out this look, then tweet me a picture @JennyWelsh28


Thursday, 8 November 2012

MUA Undressed Palette vs. Urban Decay Naked Palette

I've mentioned several times before how much I love my Urban Decay Naked Palette.  I got it last Christmas and it's been used pretty much everyday since.  However, I spotted MUA's Undressed Palette in Superdrug and thought it looked pretty similar....

After comparing them, the colours and almost identical and it's ideal dupe.  It's also just £4 whilst the Naked Palette retails for £36!


The Naked Palette has a velvet cover which everything sticks to!  The MUA palette is more practical but does feel cheaper and quite 'plasticy'.  However, the MUA palette does fit much better in my makeup bag so is a great size for travelling.

The colours are even in the same order in both palettes.


The Naked Palette comes with a really nice brush whilst MUA's has the typical sponge applicator.  However, with all the money you save you could buy several excellent brushes.

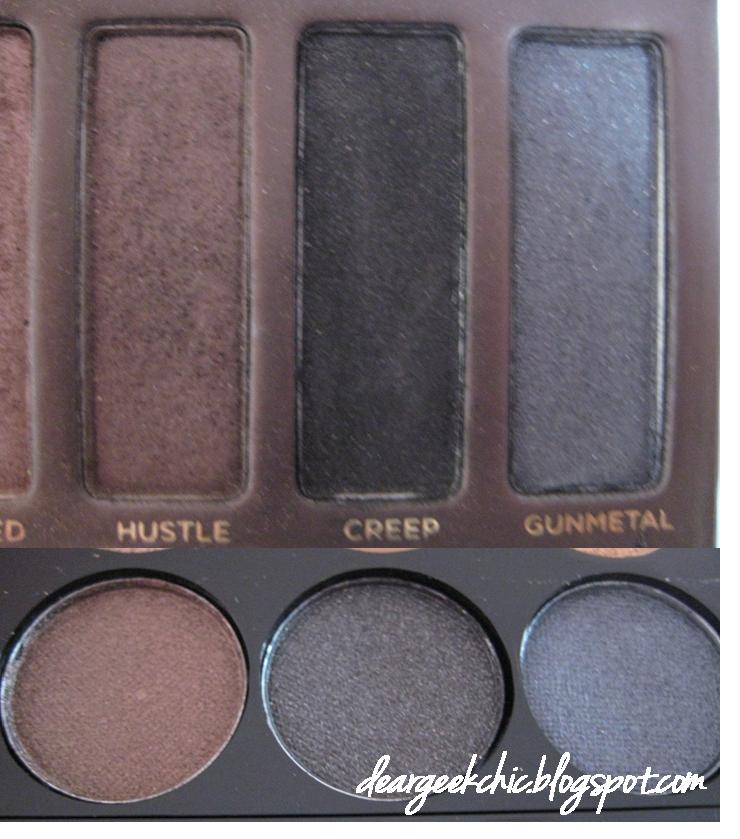
The following images are close-ups of the shades.  The Naked Palette is the top image and the corresponding dupe MUA shade beneath.


In the pan these are all pretty much identical.  Urban Decay are renowned for their quality of eyeshadows and this is normally where cheaper palettes fall down.  I swatched all the colours on my arm for you to see and I tried to use an equal amount of each shadow.


As you can see the colours come out very similar.  The only bigger difference I noticed was that 'Smog' is darker than MUA's dupe.  Also, 'Sidecar' has a difference finish.  In the Naked Palette, it has quite chunky glitter than often falls out whilst MUA's version has a much more similar consistency to the other shadows in the palette which I actually prefer.

I tried these eyeshadows out with a MAC paintpot underneath and they were pretty vibrant, I did have to apply a little more than I would with Urban Decay.  Also, they are little harder to work with and a bit trickier to blend as they aren't as creamy as the Naked Palette shades.

The MUA shades fade quicker than the Urban Decay counterparts but with a good primer or base underneath they should get you through a whole day.  

Overall, the Urban Decay Naked Palette is still my favourite but that is expected as it carries the higher price tag (£36).  However, I don't think you can go wrong with purchasing MUA's Undressed Palette as at just £4 it is an absolute steal that you won't be disappointed with.  I'm actually going to use mine for travelling as it's more convenient to take and I won't be worried about any of the eyeshadows breaking.

So if you're looking for a bargain then definitely get down to a Superdrug store and pick one of these up!


Thursday, 25 October 2012

Makeup Organisation: DIY Brush Holders

Makeup brushes can easily be left all over the place, especially if you're in a rush to get ready.  However, I've come up with a little DIY project to keep them all neat and tidy!

All you need is a jar (I used a jam one), superglue and some decorating materials!

The first one I use to keep all my face brushes together.  All I did was collect some shells whilst I was at the beach and stuck them on with superglue.  As an extra touch, I applied some glittery nail polish over the top to make it sparkle!


The other jar has eye shadow brushes in as well as my tweezers.  For this one, I stuck on silver and blue gemstones in rows around the jar.  This was a little fiddly, so I picked up the gems using tweezers before sticking them on.  I also added some sparkly nail varnish to complete this brush holder.


As an extra, you can add some beads to your brush holder for your brushes to stand in.  I don't have these though as all my brushes wouldn't fit otherwise!

I'm not an arts and crafts type person but even I managed to make these brush holders in no time at all!  Let me know in the comments if you have any decorating suggestions or ideas for future DIY projects!

Sunday, 21 October 2012

Barry M Nail Varnish in 'Strawberry Ice Cream'

Since I love my Barry M nail varnish in 'Mint Green', I went and bought another from the collection.  'Strawberry Ice Cream' is more of a summer colour but I'm a sucker for pink so got it anyway!

The polish applies really well and is a lovely, classic pink shade - I'd almost call it 'Barbie-pink!'.  I applied three coats but you could get away with just two.  The polish also lasted really well on my nails and looks really smooth and shiny!


I've also now bought 'Raspberry' by Barry M which was sold out almost everywhere!  It's a more suitable colour for Autumn so I'll upload some pictures once I've applied it.

Barry M Nail Paints retail for £2.99 and are available online as well as in Boots or Superdrug.

Friday, 19 October 2012

Makeup Organisation: Eyeshadow Quads/Mini Palettes

There came a time where I just had  to sort out my eyeshadow palettes.  I had lots of quads and mini palettes that came as part of a big set or just lots that had similar packaging.  As a result, I couldn't quickly work out which colours were in each so I ended up not reaching for them at all.

So, I decided to paint the top edge of each quad/palette with a corresponding nail varnish.  This way, it means I can tell which colours are where when they are all stacked up.


Purple nail varnish for these pretty lilac and mauve eyeshadows.


Gold nail varnish for my neutrals or metallics.


Here's the completed look!  It's much easier to find colours now and I'm reaching for these quads a lot more now!

Let me know if you have any good makeup organisation tips!


Tuesday, 16 October 2012

Maybelline Colour Show Nail Lacquer

Whilst I was in Canada I picked up a Maybelline Colour Show Nail Lacquer in 'Fierce n Tangy'.  I don't normally choose bright nail varnish (especially in yellow!) but this one was super cheap so I had to try it.

I applied two coats of the lacquer before finishing with my Sally Hansen Insta-Dri Topcoat.  I was really impressed with the opacity of this polish and the colour was really fun.  Yellow polishes are often never as they appear in the bottle so I was pleased that it was easy to achieve the same brightness as in the bottle.


The lacquer lasted really well on my nails for about a week before chipping.  I bought mine from Walmart for $2.97 so went I go back I will definitely pick up a few more colours!

Let me know if you've tried any polishes from this range :)

Monday, 8 October 2012

MUA Nail Constellations

I was really intrigued by Ciate's Caviar beads that came out a while back.  However, I could not justify spending £18 on a pack!  So, when MUA advertised their Nail Constellations at just £3 a bottle, I had to give them a go.


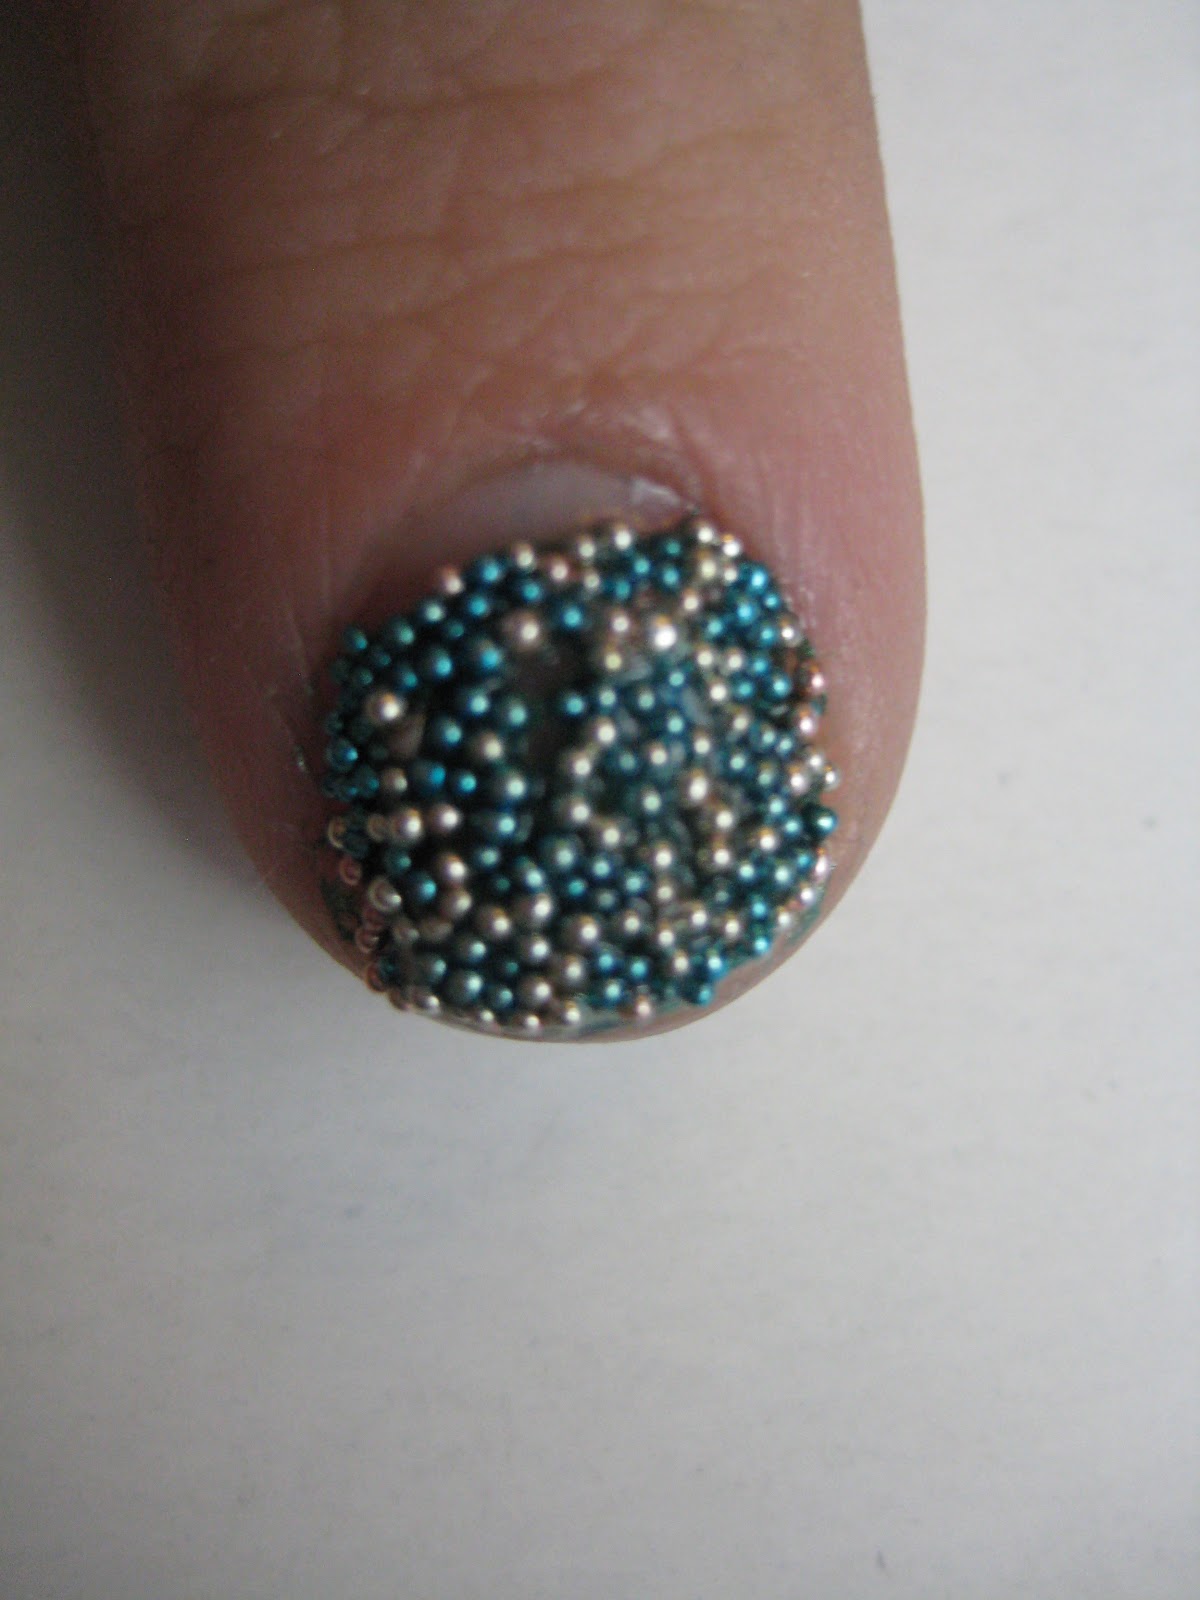
There are five shades in the range and I picked up 'Pisces' which is a mix of light gold and green beads.  All you do is paint your nail and whilst it is still wet, sprinkle the beads on top before pressing them down.

I found that some of the beads got stuck in the funnel and required some vigorous salt and pepper style shaking for them to come out.  Also, I would recommend using the bottom of a nail varnish bottle to press them down as some of mine got stuck to my finger and came off.


I did mine over a tray and then poured them back in my flipping the funnel top over.


I used my sister's nails to do this on and we decided to alternate between normal polish and the beads so as not to use the whole bottle in one go!

The overall look is really unique but won't last for very long.  Despite applying a topcoat, most of the beads came off whilst showering.  

They'd be great for a special night out or if you want to try something different and at just £3 they're worth a go!

You can find MUA Nail Constellations at Superdrug and I think they're currently selling for £2.50 so get in there quick!